Alright, let's face it. If you don't already follow my Instagram or know me personally, you should know I visit North Carolina pretty frequently. This is a jumble of photography that I just love so much because it captures the small rural town of Roxboro where my grandparents currently live. And they've lived in a good few places. I adore the rich farmland, woods, quiet homes, and history that it provides. You will see that there's small tobacco shacks that are still standing on the sides of roads, twisty gravel paths to homes tucked away behind the trees, wild animals peeking in on human lives, and run down barns that still offer a special uniqueness where they stand. The colors of the natural landscape and wood structures make my heart go crazy. Grab your fedora or boots and get outside. You know that not too far from any one place are some horses enjoying the sun or a huge bird looking for food in the treetops...
I finally made myself do it, guys. I dreamed about learning to crochet for maybe a couple years now and it is glorious fun! But let me share a short tale about how I got to where I am right now:
The first week I did make some mistakes. And that's to be expected. Sure. I knew it'd take some time and patience. Maybe even more yarn pulling out and untangling than I thought, but still, a new experience requires, or demands, some work. So, I taught myself through the wonderful world of YouTube. I watched ladies from all ages twirl their hooks around beautiful colored yarn, and I thought I as getting the hang of it. I thought the stitches I placed were the same as the women in the effortless videos were. But after noticing that the design looked off, and that my pieces were tighter than what they should be, my heart sank. I had been doing so well for my first time, I thought. Not so much. I realized that maybe I needed more practice with the different stitches that one can use for crochet and made sure this time I could call the stitch by name, and remember how each one (that I have learned at the time) was properly done.
What was I thinking? Sheesh. That, I could just start something for the first time and be a natural? That I as going to whip out scarves here and there like an experienced older woman? Well... I wanted to believe it was true.
See, I have this part of me where I set my heart and soul on something and believe I can become a master within a short time. I feel as if I'm all over the place with how many interests that I NEED to try. Naturally, crocheting, and eventually knitting (oh, yeah), were on the list.
But guess what? I may be wildly enthusiastic about trying new things and I may have an unrealistic view on how much effort it takes to learn and grow into something, but I feel like that's okay. Or at least it can be. I don't feel bad about teaching myself mistakes for a week before I finally understood the slip stitch, the half-double crochet, and the single crochet. It takes a few tries and that's definitely what I needed. I guess I'm just a "learn by mistake" kind of person.
Anyway, I'm so very proud of how I'm getting along! And I LOVE CROCHETING. It's so calming and also very addictive! (Says with a huge grin.)
Here is the
perfect DIY just in time for the holidays! My mother and I roamed the Christmas
sections in two different stores recently and found that the trend was trees
with different materials for leaves. There was a felt tree, twine trees, and
knitted trees! I love how unique you can get with a tree; it doesn't even have
to be the main tree in the living room! That's why these guys are perfect for
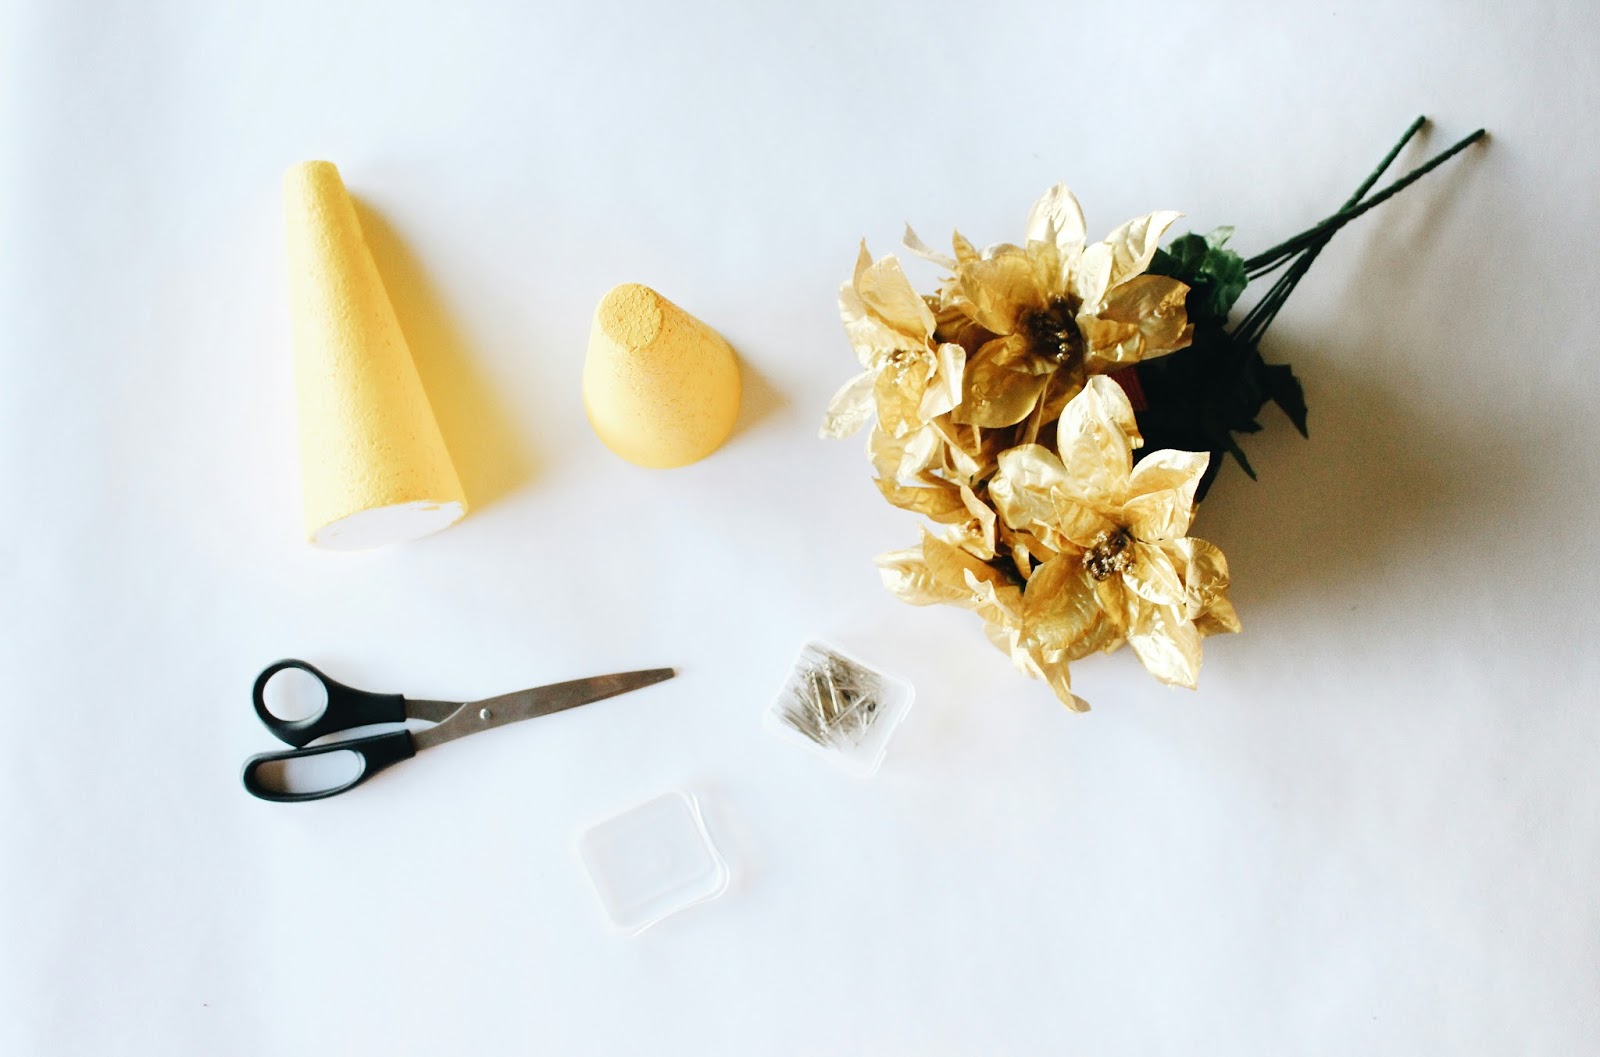
the table. Just a heads up: I painted the styrofoam before I put on the poinsettias to hide the stark white against the gold. So, do that and let them dry first! Otherwise, check it out and let me know if you love this idea!
What you'll need:
+
Poinsettia Bouquet (Dollar Store)
+ Styrofoam
Cones (Micheal's)
+ Flat head
pins
+ Scissors
+ Glue Gun
(if necessary)
+ Paint to match Poinsettia
Step 1:
Start cutting each leaf off of the stem, being careful to cut as close to edge as possible. This allows for maximum size of leaf!
Step 2:
Next, begin carefully arranging poinsettia
leaves with the flathead pins. As each one goes on, place the leaf a small
portion overtop of the one below to hide gaps. Continue this step until you
reach the top of the styrofoam tree, making sure all areas are covered.
And this is what it should look like:
If you want a tree top decoration, just cut off the sparkly middle of the poinsettia stem and superglue on the top of your tree. It makes it look complete and festive!


